Itinerary Segments are pieces of text (and graphics if required) which can be attached to services in the Product Database. When the services are used in a Tourplan quote or booking, an Itinerary can be generated which will be made up of the Itinerary Segment text and graphics attached to the services.
There is no standard method of setting up Itinerary Text—i.e. how it should be used, but there are some points to consider which should be discussed with the local Tourplan Support office:
- Tourplan is able to output itineraries in different languages. A language code attached to each itinerary segment identifies which segments are to be used when an itinerary is output. Although the term language implies foreign language translation capabilities, this is not the case.
Itinerary segments can be written in different languages and a translation table can be set up in which standard system output - days of the week, months of the year, etc. - can be stored in the foreign languages being used. An itinerary message template can be set up (with the standard text being in the foreign language) and when outputting an Itinerary, it is a case of selecting the itinerary message format of the language that is to be output, or letting the system choose, based on the language code attached to the agent.
(Setting up Language Codes and Language Translation is in the Messaging Section of this user manual Itinerary Message Format setup is in the Messaging Setup Section).
- Language code can also be used to separate different styles of itineraries - e.g. a short format itinerary that for example may accompany quotations, and a long format itinerary which is used for bookings.
- There is more than one area where text can be written which can be included in itineraries. This means that the use of the Itinerary Segments is not essential to be able to output itinerary documents. Product Note Text can be used in lieu of, or in addition to, Itinerary segments.Booking Agent or PCM agent message types are used to construct Itineraries. Language codes can be used with booking agent messages and PCM agent messages.
- Images, tables, bulletpoints and hyperlinks are all supported for Itinerary Segments. If using images we suggest speaking with Tourplan Support to see if this is the best location for the image.
The most important aspect of creating message formats (of either type) that are to be used as itineraries is that the location of the text to be used in the message must be carefully thought through. One objective must be to ensure that the maintenance of the message formats should be kept as simple as possible - in other words, obtain the text from (e.g.) itinerary segments and one note category as opposed to obtaining it from multiple note categories depending on service type.
- If using either itinerary text, or a note category, try to keep the text as generic as possible and use the messaging substitution codes to obtain service and booking information to be included on the itinerary.
- There are some services in particular that cannot be generic - e.g. sightseeing and attractions. For these services, specific text will have to be written.
There are two basic types of itinerary segments.
- One is specific descriptive text about a location, or about point to point travel. These will generally be attached to products specifically designed to carry the text.
- The other type is product specific text and these will likely include codes that will substitute service and booking detail into the appropriate place when the document is generated.
Create Itinerary Segments
-
Select menu
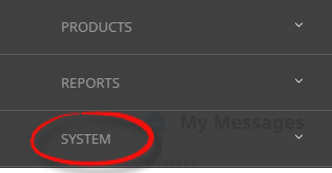
 Home > System > Code Setup.
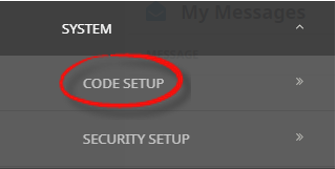
- Click the Home menu to expand it:

- Click the System menu option to expand it:

- Click Code Setup to go to the Code Setup menu:

- Click the Home menu to expand it:
-
Select menuCode Setup > Product > Itinerary Segment.
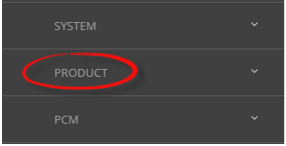
- Click the Code Setup Menu to expand it:

- Click the Product menu option to expand it:

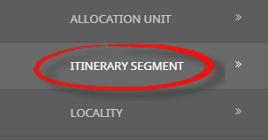
- Click Itinerary Segment to open the Itinerary Segment screen:

- Click the Code Setup Menu to expand it:
-
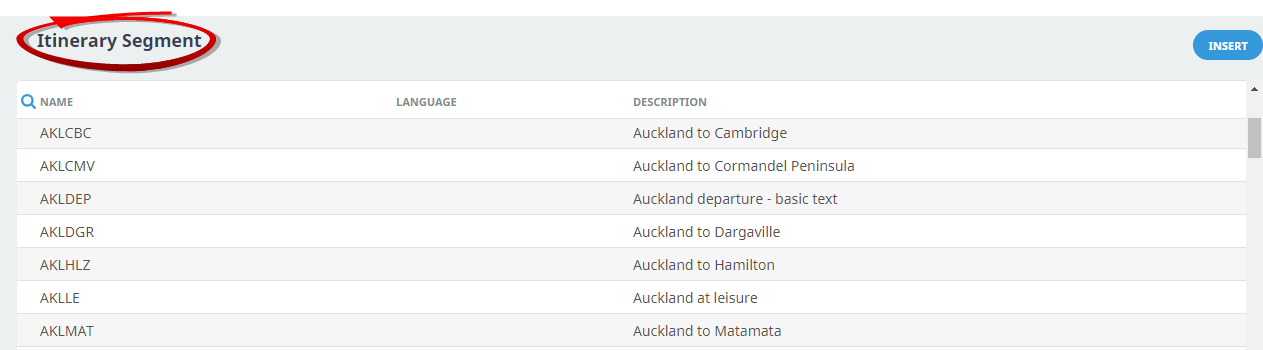
On theItinerary Segment screen, if the code required is not already in the list, click Insert.
-
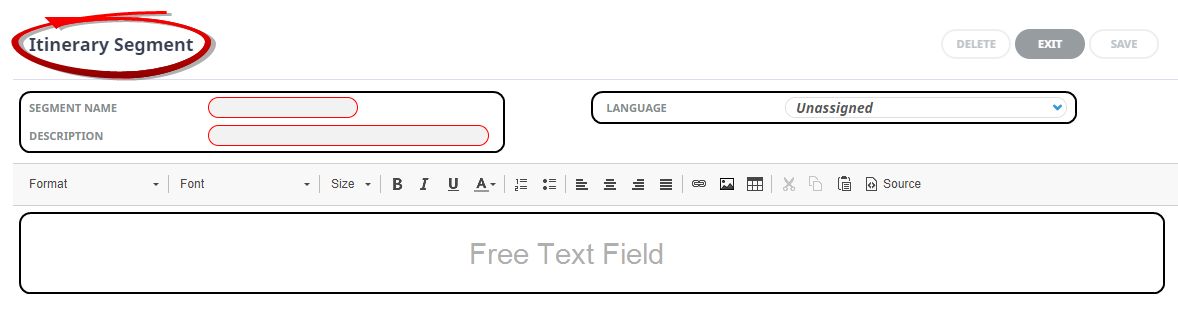
On theItinerary Segment screen, enter a Segment Name and a Description. If languages are being used, select a language, and insert the required Itinerary Segment Text in the free text field.
-
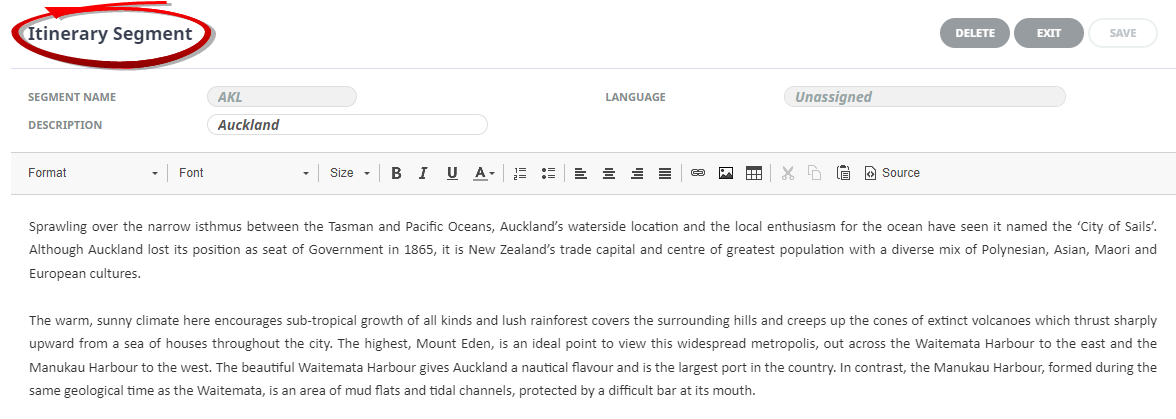
Review thecompleted screen.
This itinerary segment is an example of a Location specific segment.
-
ClickSave to keep the changes.

-
ClickExit to discard any changes.


NOTE: After clicking Save, the screen clears, ready for another Itinerary Segment - continue adding Itinerary Segments or click Exit to close the screen.
About Itinerary Segment Fields

Another use for itinerary segments is a location specific itinerary segment. This example is a generic information segment providing information on Auckland.
Segment Name
A name for the itinerary segment.
Description
An additional optional description of the segment name, this field can be used in your documentation if coded to appear.
Language Code
If languages are being used, select a previously defined language code from the drop-down.
NOTE: If language codes are not being used, the blank unassigned code must be used.
Text Field
The remainder of the screen is basically a blank page for the itinerary segment to be written on.
The rich text editor section (or body) of the note is a blank page for the
The Editing screen has the following items:

| Format type | Format Option Descriptions |
|---|---|
| Format | Format of the paragraph text. Normal, Headings 1,2,3,4,5, & 6, Formatted, Address, |
| Font | Font of text (will default from the INI Setting DEFAULTFONT) |
| Size | Font Size of text (will default from the INI Setting DEFAULTEDITFONTSIZE) |
| Style, Font and Font Size. The available styles and fonts are the Windows styles and fonts installed on the computer running Tourplan | |
|
|
Bold - highlight the text to be bold faced and click this button |
|
|
Italics - highlight the text to be italic and click this button |
|
|
Underline - highlight the text to underlined and click this button |
|
|
Colour of text – highlight the text to change the colour and click this button |
|
|
Numbered bullet points - click this button to create a numbered list |
|
|
Bullet points - click this button to create a bulleted list |
|
|
Left aligned text - click this button to justify text on the left margin |
|
|
Centre aligned text - click this button to centre text between the left and right margins |
|
|
Right aligned text - click this button to justify text on the right margin |
|
|
Left and Right justified text. Click this button to justify text between the left & right margins |
|
|
Insert a URL link – click this button to insert the text you want showing as a hyperlink and insert the required URL
|
|
|
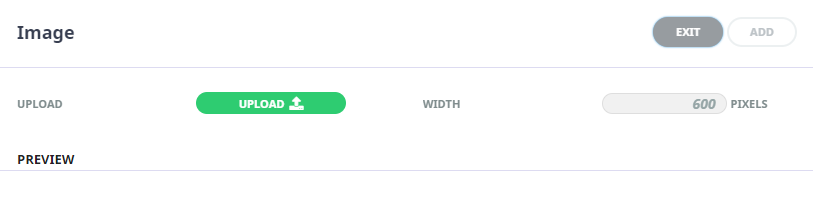
Upload an image – click this button to upload an image
|
|
|
Insert a table – click this button to insert a table |
|
|
Cut text (Ctrl+X) highlight text to be cut and click this button |
|
|
Copy text (Ctrl+C) highlight text to be copied and click this button |
|
|
Paste text (Ctrl+V) place the cursor at the point where copied/cut text is to be placed and click this button |
|
|
Selecting this button will show the text editor in CSS styling source code |


NOTE: If using indented text or tabs, ensure that all itinerary segments defined use the same indent/tab settings.
Itinerary Segment Search
Search Icon 
There is a search icon located next to the column 'Name' heading. This allows users to quickly search the Itinerary Segment application for an existing entry. An additional search field will enable users to insert text to search, and previous and next (arrow buttons) identify entries which match the search criteria.
